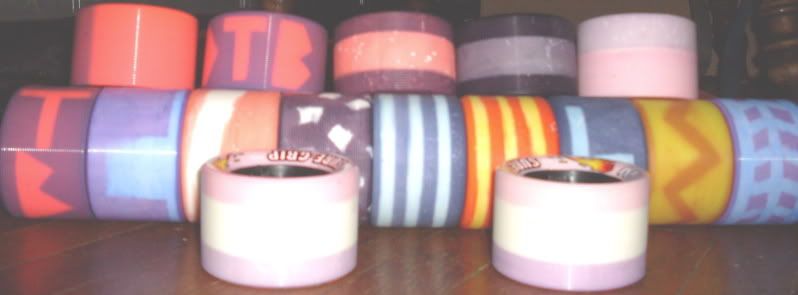
Totally not my picture, but gorgeous!
I hear a lot of people have trouble doing crossovers properly. The two main complaints are that they aren't achieving the proper positions, or that they have no power. Here is a wonderful video that breaks it down step by step:
http://blip.tv/file/get/BoutDerby-TechniqueWithLukeBiggerstaff292.flv
http://www.boutderby.com/forum/drills/technique-with-luke-biggerstaff
(If I was smart, I'd figure out how to embed this -_-;;)
http://www.boutderby.com/forum/drills/technique-with-luke-biggerstaff
(If I was smart, I'd figure out how to embed this -_-;;)
Breaking it down, you want to make sure your stance is low, with your knees, shoulders and toes all in a vertical line. Shift your center of mass over your left skate and transfer all of your weight so that you can lift your right skate and, well, cross it over. Once your foot is down, you simultaneously push your left skate behind you as you transfer your weight to your right skate. Then, when all your weight is on your right skate and your left skate is significantly behind and to the right of your center, you lift your left skate and bring it to the front. Now you are doing the opposite, where you are pushing your right skate back while simultaneously shifting your weight to your left skate.
Yeah, I know I'm not the most eloquent person on the internet, but this should give you a basic idea. In the meantime, there are several drills you can try. You can do all of them sans skates while you build up muscle memory and confidence, and then incorporate skates as you get better.
Side stairs: Stand at the bottom of your stairwell, facing the right wall and with the stairs to your left. Take your right foot and pass it in front of you, placing it a step or two up. Use that foot to lift you up, and bring your left foot behind you to the next step (or two) up, and lift with that one. Repeat all the way up. This will help you feel the difference in push from one leg to another and will help a bit with strengthening.
Grapevines: Similar to the stairs, but on flat ground. Stand on a line, facing perpendicular to it, and pass your right foot over the left foot, making sure you are always centered over the line. Then bring your left foot behind and placing it to your side. You can continue to do this always stepping with your right foot in front, or alternating steps with your right foot in front once and then in back. When doing this with skates, try to keep your wheels straddling the line, without rolling away from it. This will help work your stability.
Drunken Sailors: Here you start on a line, facing in the same direction. Take your right foot and drop it in front of your left foot, but two feet farther to the left. Then take the left foot and drop it in front of the right foot, but two feet to the right. This is a very exaggerated motion, but again it works on throwing your weight around and switching up your balance.
As for the actual crossovers on skates, a lot of instructors will break it down into two different motions:
Skooters: Just like when you were a kid. Keep all your weight on your left foot, which is never going to be lifted off the ground, and kick back with your right foot. Make sure you glide for a bit on just your left skate so you can get used to propelling yourself with the force of your right kick. As you get more comfortable, start off the motion by placing the right foot farther in front and to your left.
The other skooter: Now try to keep all of your weight on your right skate and kick with your left skate. At first you will be pushing pretty straight, but try to push farther behind and to the right as you get more comfortable.
Crossovers (also referred to as "pushbacks"): Now that you have isolated all the parts, try to bring them together. Drag each motion out a bit at first and focus on each part. Make sure that you are pushing with both feet and shifting your weight around fluidly from one skate to the other. In the end, make sure that you are working Smart, not Hard. Make every kick count and don't skimp on the length of your strides! Oh, and don't forget to use your arms ^_^
 I also just completely stole this from TinySoprano on Skatelog... but I gave a quasi-warning!
Yeah, I know I'm not the most eloquent person on the internet, but this should give you a basic idea. In the meantime, there are several drills you can try. You can do all of them sans skates while you build up muscle memory and confidence, and then incorporate skates as you get better.
Side stairs: Stand at the bottom of your stairwell, facing the right wall and with the stairs to your left. Take your right foot and pass it in front of you, placing it a step or two up. Use that foot to lift you up, and bring your left foot behind you to the next step (or two) up, and lift with that one. Repeat all the way up. This will help you feel the difference in push from one leg to another and will help a bit with strengthening.
Grapevines: Similar to the stairs, but on flat ground. Stand on a line, facing perpendicular to it, and pass your right foot over the left foot, making sure you are always centered over the line. Then bring your left foot behind and placing it to your side. You can continue to do this always stepping with your right foot in front, or alternating steps with your right foot in front once and then in back. When doing this with skates, try to keep your wheels straddling the line, without rolling away from it. This will help work your stability.
Drunken Sailors: Here you start on a line, facing in the same direction. Take your right foot and drop it in front of your left foot, but two feet farther to the left. Then take the left foot and drop it in front of the right foot, but two feet to the right. This is a very exaggerated motion, but again it works on throwing your weight around and switching up your balance.
As for the actual crossovers on skates, a lot of instructors will break it down into two different motions:
Skooters: Just like when you were a kid. Keep all your weight on your left foot, which is never going to be lifted off the ground, and kick back with your right foot. Make sure you glide for a bit on just your left skate so you can get used to propelling yourself with the force of your right kick. As you get more comfortable, start off the motion by placing the right foot farther in front and to your left.
The other skooter: Now try to keep all of your weight on your right skate and kick with your left skate. At first you will be pushing pretty straight, but try to push farther behind and to the right as you get more comfortable.
Crossovers (also referred to as "pushbacks"): Now that you have isolated all the parts, try to bring them together. Drag each motion out a bit at first and focus on each part. Make sure that you are pushing with both feet and shifting your weight around fluidly from one skate to the other. In the end, make sure that you are working Smart, not Hard. Make every kick count and don't skimp on the length of your strides! Oh, and don't forget to use your arms ^_^
I also just completely stole this from TinySoprano on Skatelog... but I gave a quasi-warning!