Monday, December 12, 2016

Tailcoat V2.0


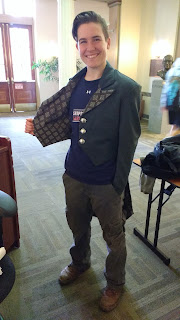
Despite all the shit that I have experienced this year, I have still been excitedly looking forward to Victorian Christmas. Especially now that I live in Bellefonte! I haven't really made anything for myself, but I was tasked in making a tailcoat for Cas, and I'm not failing at it! I used the same 1950's pattern I'd used for Dan a couple of years ago for Rocky, and made some modifications.

First of all, Cas is significantly straighter up-and-down than Dorito Back Dan, and it would be nice if the shape preceded the pattern by, oh, 60 years. The easiest fix for both of these was to change it from a one-button to a three-button front, and to make the tails rounded and not pointy.


And then there's the fabric. Oh, the fabric! Surplus City had this gorgeous greenish teal/oxford grey cross weave wool blend that has such a nice hand to it. The interfacing isn't giving it as much structure as I had wished, but the lining steps up to the challenge. And oh what lining ::swoon::


Dapper AF


Sleeves can still go fuck themselves.


I ended up not affixing these buttons because they were too big for the proportions of the coat, and I (mostly Dani) didn't have anything 3/4" in stash.  But that will be a quick fix one of these days.  I also made a cravat out of the leftovers of my Idris dress.  The crosswoven blue looked fantastic!  But damn did those fucking fabrics refuse to iron flat -_-


As for my dress, Dani and I went Thursday to The State Theatre for an early showing of the new PBS show Victoria, and a test run of our dresses.


I felt the beaver was four inches too long and kept getting caught in the bustle, so of course I woke up at 8 am and made myself a new circle skirt and let Nicole wear this one.

Sunday, November 20, 2016

Stairwell


Progress on the house has been slower than I would have liked, but I finally finished painting the foyer and stairwell.  Unfortunately, the colors I chose for the upstairs and the downstairs aren't playing nicely in the center, and the olive drab looks more evergreen up against the crimson with the lamp light.  Now that I stained the trim and it is no longer blonde wood, the colors look a bit better, but I think I'm going to need to stencil something on to the wainscoting or glaze it with something that makes it darker and yellower.  But hey, progress!

On a side note, maybe I shouldn't have stained wood during the first snowfall of the year >.>

Monday, September 26, 2016

How to size skate boots

There are way too many styles of skates out there and everybody will find comfort in different shapes.  Here are the things that I look at when I try on new boots.

  1. Have you played any other sports? What sort of shoes did you wear for that? My best analogy is to find skates that fit like soccer cleats. You want the leather to hug your feet so that all of your power is transferred directly into them and into the floor.  If your foot moves around inside, you can risk rolling your ankle, stubbing your toes, and getting blisters and abrasions.
  2. Different socks will give you a different relationship with your skate.  A lot of skaters with more experience (and expensive skates) will skate barefoot.  If you have more delicate feet or if your skates aren't nice leather, you might want to go for a thin athletic sock.  I used to skate barefoot but I don't remember why I started wearing socks again, and now it is just habit.  I prefer scratchy cotton socks because they keep me from sliding around.  Other people like dirty socks for the same reason.  While some other people will prefer hose or thicker hiking socks, but I do not know their reasoning for their choice.  Think about this when sizing your skates.
  3. Boot height.  If you are afraid of rolling your ankles, hightop boots are not going to protect you.  Constant skating (and off skates workouts) will make your ankles stronger and less prone to sprains.  In the meantime, you can wear an ankle brace for support if you must.  What hightop boots _do_ help with is protecting your ankles when you get kicked.  What other options are there to hightops? Most skates hit exactly at the ankle bone, while some brands offer ultra low cut boots that end below that. I love the Riedell 195 ultra low cut boot because anything I tried before restricted my range of motion and cut into the vein I have running directly over the inside ankle bone on my right foot.
  4. Material.  While there are vegan skates (and they will proudly announce it), synthetic toppers have a tendency to wear out faster than leather.  If you are a smaller skater, you can sometimes get away with this because you are exerting less force on them and demanding less support.  Even then, some people do manage to get several years out of R3s and swear by them.  For everybody else, most skates will be full grain leather, with some higher end styles offering "kangatan".  Unfortunately, this does not mean that they are supple kangaroo leather.  They are, however, cowhide that has been treated to behave as such. Some skates will also make a huge deal about being heat moldable.  All leather and most vegan skates are heat moldable because they all have plastic counters (the stiffer pieces in the boots around the heel and side of the toes) and interfacing.  For this same reason, they will stretch and deform the longer you skate in them, and even worse if you leave them in your hot car.
If you need more things to consider, look at what shoes you like to wear for different activities and try to imagine how that would translate into skating.  Do they get in your way? Is there a part of them that is uncomfortable?


PRICE  
A beginner pair of skates can cost $100-250, depending on whether they are a color other than black, or if they have upgraded the wheels and toestops.  Again, many people love these and can skate a few years on them!  If you do plan on skating for a longer while and have some money to spend, an intermediate pair (or bottom level good skate) can cost ~$350. Once you start looking at "competition" level skates, they can start at $200-600 just for the boot, plus $50-350 just for the plates, plus $60-120 for the wheels, plus $15-30 toestops, plus $8-200 bearings... So yeah.

You also don't need to buy a super duper awesome pair of skates all at once!  Most of us will tinker and switch out parts one at a time.  Wheels and toestops are normally the first to go, since you will eventually want different sets of wheels depending on what surface you are going to skate on. At the very least, you should have a set for your home rink and a set for skating outside (in parades!).  If your skates come with shitty wheels by default *cough*R3*cough*, you can use those outside and get real wheels for practice.

A lot of websites will also have huge sales the week prior to Thanksgiving and every other major holiday.  Five On Five will normally put out a list of all the stores and what sales they are having.  Skating rinks will often offer 20% on MSRP. derbywarehouse.com and bruisedboutique.com are two of the more popular/well stocked online stores.


SIZING
The reason I started this post. Each manufacturer will make skates however the hell they want to.  Most of them will follow standard mens sizes, and going with "two sizes smaller than your regular shoes" is a relatively innocent place to start your search.  Mind you, I can wear shoes anywhere between a 9.5-11.5, and have been known to wear smaller if the shoes are cute enough, but skate in a 7.5.  This also doesn't account for the shape of your foot.  Since heel slippage is one of the biggest complaints skaters have, a lot of newer skates have started making much narrower heelcups (this can be ameliorated with heat molding and/or inserts).  The best thing you can do is go to the manufacturer's website and print out their sizing guide.
  1. Make sure you are printing true to size.
  2. Stand on a piece of paper and have someone else trace your feet, and cut them out.  Do both in case there is a noticeable discrepancy between their sizes.
  3. Place your foot tracings on the sizing guides and see which one would give you the truest fit.
    • Some brands will use different lasts (foot shapes) for different models. In some cases, you can even mix and match the front and back halves if your feet have a very distinct shape.  Some brands will even allow you to buy two different sizes if your feet have a noticeable difference.

Riedell: https://www.roller.riedellskates.com/sizing-help
Bont: http://www.bontcycling.com/items/support/sizeChart.html
Antik doesn't have anything on their site: http://www.derbywarehouse.com/skatesizing.html
Sure Grip's isn't helpful, either: http://ctmfx.jzxnz.servertrust.com/v/vspfiles/images/BOOT.pdf

So yeah, there are a lot of options and a lot of things to take into account.  Whenever possible, try someone else's skates on, or go to a "local" retailer.  
  • olympicskatingcenter.com  Mac at the Harrisburg (Enola) rink is very knowledgeable, but often errs on the side of cheap.  He hates to make people pay for expensive skates when they might drop out in a year. He will give you the derby discount.
  • funtastikonline.net Funtastic is in Mechanicsburg.  They are primarily a skateboard shop, but the guys are very nice and have been breaking into derby for the past four years.
  • squareup.com/market/bentleys-skate-shop  Bentleys in Pottstown is owned by one of their refs. 
  • apexskateshop.com Apex is a shop towards Philly owned by Kick Ash and V-Diva.  Kick Ash is VERY knowledgeable about gear and will help you find a perfect fit!  She is also ridiculously distracted, so make sure you keep her on topic and you have a lot of time to spare.
  • If you are on the Pittsburgh side, Doc Sk8 is a very sweet yet crochety old man that has been building skates for eons.  His garage in Butler County is overflowing with skates that he builds and fixes for SCRD, and he will go out of his way to make sure you are ultimately equipped. 
These are the sellers that I have personally dealt with, but there are definitely a few more in PA that I can't remember.  And, of course, a few more in larger cities, like Bonny Thunder's Five Stride in NYC.

Also, I am 99.9% sure that the moment you ask someone else, they will have a completely different approach to skates.  Because everybody in derby has opinions, and they are most often different than mine. And I didn't even get into plates -_-; Happy hunting!


ETA link with good explanation on bushings/cushions.
Plate measuring explanation (in spanish with images)

Thursday, July 21, 2016

FUUUUUUUUUUUUU

http://www.safebee.com/home/how-get-rid-wasp-or-bee-nest-5-steps

Sometimes

you just really need to break shit first thing in the morning.  Like this very inconveniently placed shower.


Under that drain is the main staircase to the basement.  You know, the one you would use if you needed to replace a water heater.

Who knows how long this stall has been in place, but it is extremely brittle.


 And parts had rusted off/together.


At least the wall looks intact behind it and there is no mold.


Too bad the sink is on this side of the shutoff valves, so now I need to try to take those last fittings off the end of the pipes to cap them off, and they are not cooperating.


Wednesday, July 20, 2016

Salmonella or botulism?

Hopefully neither.

Pennsic, once again, is on the horizon. Having recently bought a car, bought a house, and lost my job means this year will need to be extra cheap.  So I'm canning eggs.


I picked up a case of 7.5 dozen eggs from Sam's Club for $11, 18 pint jars from Ollies for $12, and a gallon of apple cider vinegar for $3. All of the spices and canned beets were already in my pantry, and the jars are reusable, so it's pretty much $15 for an epic amount of portable, shelf stable protein.

In my research, I found everything from canned eggs lasting years in the basement to OMG EVERYTHING WILL KILL YOU, so, whatevs.  I don't plan on them surviving more than a month, so I'm not terribly concerned about over sterilizing everything.


I found a life hack that you can bake eggs at 325F for 30 minutes instead of having to deal with bringing water to a boil and whatnot.  It mostly came out ok!

1. Preheat oven to 325F (or 350F if your oven isn't reliable) while you place eggs into cupcake tins so they don't roll around.  Cook for 30 minutes.
    • Normal cupcakes are ok, but mini cupcakes will let you fit twice as many.  My new oven is huge, so I can fit two trays on each rack, for a total of 8 dozen eggs at once.
    • Unfortunately, I only had three mini cupcake tins, so I tried using a regular cupcake tin with two eggs in each cup.  Some of these eggs came out with soft spots >.>
    • The eggs that were fully cooked had small charred brown spots where they were touching the tins.  It is ok and doesn't affect the rest of the pickling.
2. Pull cooked eggs out of the oven and cool down.
    • Placing them in ice water helps the flesh retract from the shell (and keeps you from burning your fingers).
3. Shell eggs and place five in each pint jar.
    • Some websites made a huge deal about only using unblemished eggs because pitting and splits are focus points for bacterias THAT WILL KILL YOU.  I don't think I managed to get more than half of them unscathed. 
4. Add spices and vinegar to jars, making sure to cover the eggs completely (because vinegar is a magic barrier, apparently) while leaving enough space at the top of the jar to create a vacuum.  Put lids on jars, leaving the rings loose so air can escape.

5. Put jars in canning pot with enough water to reach the top of the jars and bring to a rolling boil, making sure the contents of the jars are also heating up.  According to the Kuntz Family, who's canning instructions I was following, you want to make sure the contents reach 200F and are kept there for 15 minutes.


6. Use the forceps to pull the jars out. Unscrew the rings to give the jars a final burp, then screw them on tight again. Beware of molten brine shooting out in every direction >.>

7. Let cool on the counter top and await eagerly to hear the lids pop!  Now that the eggs have been pasteurized and sealed in a harsh environment, they should be safe to eat for at least a year if kept in a cool and dark environment.


Now, remember when I said some eggs came out with a soft spot?  You can microwave the peeled egg for 30 seconds to heat it up, but it won't heat enough to cook.  You can heat it up another 15 seconds with no problem, but once it hits 16, there might be a slight boom that blows the microwave door open.  Just so, like, you know.


The fun part will come in two weeks when we eat all of them in camp.  I made four jars with beets and twelve with six different spice combinations.  I will do my best to do a write up of the critique and spice blends when I get back.

Friday, June 10, 2016

Yay home ownership!

This week has been busy.  After about three loads of laundry and another of dishes on monday, we found out tuesday morning that the heating element in the water heater had died.  Dave said he would fix it after work, and he tried. And then the heater didn't want to drain over night.


So I spent a couple of hours draining 18 gallons of water into my calphalon pan and dumping it down the toilet.  And then I tried to pull the elements out.


The top one was perfectly ok.  The bottom one, not so much.


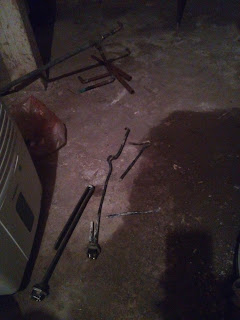
 It was all bent out of shape and totally encrusted, so I had to saw a piece off and manhandle it out.


But wait, there's more!  Lime sediment all the way up to the opening for the element.


I tried some vinegar to break it up, but I would have needed soooo much more than just a gallon of cleaning vinegar.


So I went to True Value to pick up something stronger, and they told me this needed to be sucked up.  So I picked up a third shop vac instead.


Fourteen hours of hell and three gallons of lime sediment sucked out later and I finally have a working water heater again, with two new elements and a new thermostat.

This Is The House That Suck Built

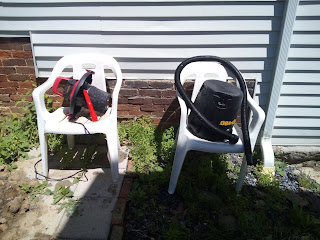
I have this thing about vacuum cleaners.  Specifically shop vacs.  They are so useful!  So when the water heater elements ate shit, I panicked that I couldn't find my one gallon shop vac (my first!) that I only use for wet pickup.  Enter Number Three, my new 2.5 gallon wet shop vac.  I gave it a good shower after the hell that I put it through on wednesday.


This is Number Two.  16 gallons, used for dry pick up, and I've put it through so much hell over the last many years.  Especially with the room demo.


And then I find this whiny little bitch hiding in a cabinet in the laundry room >:[


And because I need something that isn't industrial powered, I found this little beauty at Good Will for $5.


Yep, vacuum cleansers.  Second only to sewing machines >.>

Thursday, May 26, 2016

This is why you never leave me unsupervised.

No, like seriously.  Don't leave me unattended or I pop the bubble in the old paint and try to remove all the flaking wallpaper.

And then the old and ruined plaster crumbles off and I have a 12x8" hole.


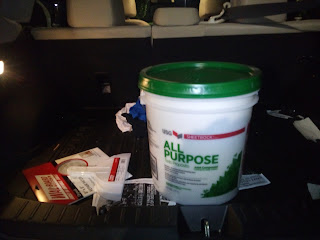
And then I end up at Home Depot ten minutes before they close with a five gallon bucket of plaster.


A few layers and a week later, it fills in nice.  Meanwhile, I find another mass of loose wallpaper near the door and obviously pick at it.


The archaeological dig is fascinating!


Eventually I manage to get paint on the actual walls.


And stain the wood for the trim.  I am beyond happy with how this looks.


Three layers of paint later, I try to hand the wainscotting.  Welp, metal nails don't want to go in through the plaster, and the walls aren't flat enough for Liquid Nails to make enough contact.


That is a full tube of glue.  I ended up taping it to the wall and maybe the top left third ended attaching.  Will the next pieces manage to stick up?  Who knows!  But I haven't burned the house down yet.  I just want something that will survive 3-5 years while I restore some of my savings and redo the kitchen (which takes much higher priority).


Oh, the flooring has finally started!

Sunday, May 8, 2016

Adulting

I bought a house exactly a month ago.  As I understand, it is a Queen Anne Vernacular style of Victorian house built in 1890.  It has fantastic spaces and enormous potential, and it is going to take me forever to fix it in true Victorian form -_-; And, as a wonderful coincidence, my friend Yana lived in it growing up, as it belonged to her grand mother and then her aunt. I really hope to get all of the information about it from her soon, including old pictures.


The attic window look out over Talleyrand Park directly at the Bellefonte court house.

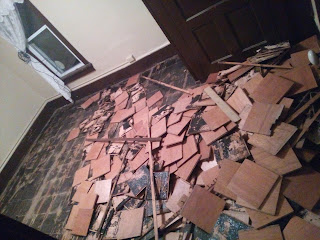
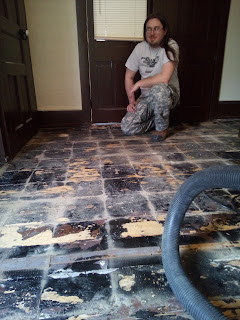
The first main project we are tackling is the floor.  Paraphrasing Les Luthiers: Por que la gallinita dijo parquet?  POR QUE?!?  The parquet has been around longer than Yana's family can remember, and was stuck down with way too much tar. While yes, I have more experience that one person could ever need in removing bituminous materials, this is way too much to dissolve.  Luckily, it is so old and vitrified that I've been able to chisel some of it off where needed.  Dave and I plan on leveling it out as much as possible before laying a floating laminate to get us through the first several years until I can recover from the purchase and install a substantial hard wood floor.


Unfortunately, there may be a bit of a Pandora's Box in the walls.  A) the electricity is overlaid and may or may not be grounded.  This isn't a total problem since it is easy to rip it out and wire it correctly.  And I'm ok with it being superficial since that will allow me to put in as many outlets as my little black heart desires.  B) There are a couple of dodgy spots in the plaster.  There is this one specific patch behind a kickboard that is a good 1/4" thicker than the surrounding wall and is starting to crumble.  On the wall opposite of this patch was a radiator that missed a significant number of paint layers over the decades and also looks questionable.  The closet they installed in the corner is built around the previously existing kickboard, and half a sheet of the same bead board is installed opposite of it next to the front door of the room. We are considering continuing the bead board in a chair rail around the rest of the room in order to hold the walls in for a few years until we have enough money to go whole hog on each individual room.  Yes, I know this is a dangerous proposition and that most people forget and never come back to do it right, but I really need to get this floor serviceable so we can finish moving in.


There are things that must be done, things that need to be done, things that can be done, and things I want to do.  Budgeting for all of these is going to be a bitch, especially when all of these can be done for right now so we can use the space, well and can last a long time, and mega super upgraded for ever.   nnnnng

Tuesday, February 9, 2016

I did the thing! But she'll probably score the points.

A girl recently transferred to SCAR from California and decided to change her skate name to Zombabe.  I told her she should totally paint her helmet into a brain, but apparently people charge a shitload to do this, and she claimed she didn't have the skill to do it herself.  So I jumped in head first.

1) First, I cleaned off the helmet with alcohol. Simple enough.
2) I traced some pencil lines where I wanted the folds to go, and then filled it in with paint markers.  I didn't particularly like how this looked, but I figured it would adhere pretty well to the helmet and give a good base layer.

3) Clearcoat
4) Clearcoat
5) Clearcoat

6) The easiest thing for me to use was acrylic paint.  It comes in all colors, and it is pretty stable once it dries.  I had to do about three layers overall to get full coverage and good detail.


7) Clearcoat
8) Clearcoat
9) Did I mention Clearcoat?  I even did a light layer after the first acrylic layer.  I want this paint job to survive being banged up in a gear bag.

10) I wanted to add a sblechy red jelly feel to it between the folds, so I caked on red glitter glue.  Again, it took a few layers to build up well, and I probably did a couple of clearcoats in between, for good measure.


11) I added the green shading with a translucent acrylic made for stained glass.  I'm not too thrilled that there wasn't black in my set, so the green came out pretty neon.  But it looked pretty cool all in all.  With probably eight more clearcoats.


12)  In the end, she added name stickers.  I think they fit well.


I did not add a penis.  I have no idea what you are talking about!  Get your mind out of the gutter.


 The vulva is totally legit.


Also, the clearcoat is just Rust-oleum Painter's Touch 2X Ultra Cover Gloss in Clear.  Maybe less than half a can?  And the beauty is that each coat didn't have to be perfect, since I put so many on in the end.  Just give it about 20 minutes between each coat.